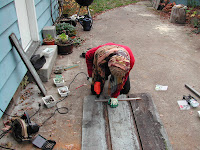
my pride and joy:
after some months of having to search through a crowded spice cabinet any time a meal was made, i finally decided it was time. time for organization. time for spice clarity. time for powertools of destruction.
and thus was born the spice rack.
p.s. i know- the picture is crooked.
16 November, 2007
12 November, 2007
mushroom and leek soup
it's mushroom season. last week (or maybe that was two weeks ago....) we went to the mushroom festival where hundreds of edible and non- edible mushrooms were on display. there was renaissance music and young men with feathers in their caps. there were mushroom starter kits, and mushroom food, long lines for the honey buckets (portapotties), and hay rides sans hay. at the farmers market every stall has chanterelles. and the occasional adventurous farmer will have some exciting foraged mushroom on sale. so this week we bought some chanterelles and 'fried chickens', harvested the last of the leeks, and made a tasty soup.
3 leeks, chopped somewhat fine (we wanted to use the last of our leeks up, but 1 cup of chopped leeks would do)
1 1/2 cups chanterelles, chopped
1 1/2 cups 'fried chickens', chopped (or another mushroom like portabella, the buttons, porcini, etc.)
1 T olive oil
1 T margarine
1 1/2 cups water
1 1/2 cups soymilk
1 t yellow miso (or another mild miso)
1 T parsley
4 T veggie broth powder (or if you have liquid broth, just use 1 cup of it in place of water)
1 t pepper (or to taste)
saute the leeks and mushrooms in a pot until the leeks are tender. take out 1/2 of the leeks and mushrooms. puree in a blender, then add back to the pot. add the rest of the ingredients and simmer for 5 minutes or so. the mushrooms should be tender, but not mushy.
and that's it. you can eat it now.
if you really wanna get snobby, add some red wine or sherry to the leeks and mushrooms while they are being sauted. or add 1/4 cup of cream cheese for a richer soup. or add both for extra pretentiousness!
11 November, 2007
seed saving 201: actual collection
this is our first year collecting seeds, so we're still figuring out the plants ourselves. most garden plants will bud, flower,and produce seed. in some plants the seeds are in the fruit, and other plants don't produce fruit at all. a good rule of thumb is that the seed is ready if you can't put your fingernail through it- the seed should be hard. these are the plants we collected seed from, or are in the process thereof....
lettuce: lettuces will bolt, which means they start growing upwards rapidly and become bitter tasting. they typically bolt as the season gets warmer. you'll want to collect seed from the late bolting plants, to promote the trait of late bolting in future plants. after the lettuce has bolted (and the plants can get very tall), it will begin flowering. while flowering the plant will be visited by various nectar collecting insects. the flowerheads will turn white and fluffy. the fluffy cottony part is called papis. when about 3/4 of the flowers turn to papis pull the plant out of the ground. keep the plant upside down in a paper bag, and set in the sun until plant is completely dried out. this takes around a week. after it's dried, shake the plant over a bag, screen, anything to catch the seeds. pull any remaining seeds from the flower heads. lettuce seeds are very tiny and thin. their colors can range from black to brown to a dark tan.
marigold: simply let the plant flower, and don't dead-head. once the flower is dead, it will dry out on the stalk. the seeds will be in the old flower head. split the flower head open, and the seeds will be easy to shake into your hand.
calendula: again, let the plant flower, and don't remove the flower. it will dry up and leave curved rough seeds on the old flower head. collect them when they are hard.
nasturtium: after the plant flowers it will produce a roundish green seed. it will turn dark brown and hard when it is ready to be collected.
morning glory: after the plant flowers it will produce a greenish fruit. this will dry up and become brown. when you put pressure on the fruit, it should pop open, not squish. if it squishes, the seed is not ready. if it pops open then the seed is ready.
garlic: wait until the stalks are dying and turning brown and pull the garlic head up. this is when you would normally harvest it. set aside the heads you want to replant, and hang in a dark dry place until next season. break up the garlic head, and plant the cloves individually.
tomato: pick the ripe fruits that posess the traits you desire. slice the tomato down the middle, lengthwise, and scoop out the seeds. place the seeds in a ceramic or wooden bowl. add enough water to cover the seeds. set aside in the shade for a day, this should allow most of the pulp to seperate from the seeds. rinse the seeds off in a strainer. place the seeds back in a bowl, cover with water again, and set aside for another day. this should remove the remainder of the pulp. rinse the seeds again, then place them on a drying cloth. once dry, place in a storage container.
broccoli: broccoli heads will go to flower, and then take a long time to form thin pods, called siliques. then the pods will take a long time to mature. once the pods toward the bottom of the plant start to open, pull the entire plant up and place upside down in a paper bag. leave in a warm dry place, until the plant is dried up. rub the pods against a small screen to seperate the small round seeds from the chaffe.
cucumber: another lengthy process. the fuits produced later, usually have more seeds. select the cucumbers you want to save seed from, and allow them to ripen on the vine. they will turn a yellowy orange color. once the cucumber becomes mushy, pick it from the vine. cut the cucumber lenghtwise and scoop out the seeds. like the tomatoes, place the seeds in a wooden or ceramic bowl and add a bit of water. allow the seeds to ferment for a few days, and stir them every once in a while. when draining the seeds, the good seeds will stay at the bottom. discard the other seeds with the pulp. place the good seeds on a screen to dry. after two or three days, they are ready to store.
beans: all bean seeds can be collected in this manner, except for mung beans. allow the selected bean pods to dry on the vine. pick before the first frost. remove the beans from the pod. allow the beans to dry for a month, and then store. keep the drying beans in a warm dry area.
a good book on seed collection is "Compleatly Self-Sufficient Food-Plant Propagation" by Herm Fitz.
09 November, 2007
seed saving 101
saving plant seed from the garden is beneficial financially and for genetic plant integrity in your climate. it's not hard to do, but can take up extra space in the garden for a prolonged period of time and some waiting around (ie:broccoli). so when planning your garden, it's good to know how long it takes for certain plants to go to seed. for example- if the seed is mature in the edible fruit (tomatoes) or if it matures in a later phase of the plants life/cycle (broccoli). some seed saving can be a bit tricky, like tomatoes, whereas other seeds are easily gathered.
when saving seeds you want to keep in mind that each seed has its own genetic code with different individual traits. so you'll want to collect seeds from fruits with desirable traits- germination time, flowering time, size, taste, color, disease/pest resistance.....plants with individual fruits (tomatoes, eggplants, peppers, beans) it's easy to see which fruits to save for seed (first to ripen, last to ripen....). plants without specific fruits (broccoli, lettuce, kale, spinach) you look at the individual plant as a whole (last to bolt, fast grower, disease/pest resistant, production). one way to do this is to have several color-coded flagging ribbons, sticks, etc. to correspond with different traits. it's probably a good idea to collect seed to collect seed from at least two plants of the same variety for genetic diversity. this prevents susceptibility sudden changes in climate or pest presence (we've all heard of the irish potato famine......). planting a few seeds from every year of collection also helps increase the gene flow amongst your plants and it is probably a good idea to plant some seeds from an outside source (purchased, from a neighbor, etc.) every five years or so to widen the gene pool.
another thing to keep in mind is hybridization amongst species in the same families. some plants are more susceptible to hybridization than others, such as brassicas (broccoli, brussels sprouts, kale) and winter squash (butternuts, acorns, pumpkins). to prevent hybridization limit the varieties grown within the same family and plant as far from each other as possible. something else to consider is how the plant is pollinated (insect generalist, insect specialist, wind) so that you can create appropriate buffers in between the plants; and whether it can be pollinated by itself. if the plant is self-pollinating you would only need one, however if it is not you would need at least two within a close proximity. just for clarity: you can plant as many butternut squash plant you can fit in an area, but make sure your acorn squash are at the other end of the garden with plenty of flowering plants in between.
still to come: seed saving 201, Seed Saving Simplicity
07 November, 2007
little fatty poop machine and the search for the new nest
this weekend we decided it was time to get the compost heap in order. it has been neglected for quite some time.....and not by us. it was there in all it's confusion when we moved in. generally, it's been to have three or so different heaps of compost, in varying stages of decomposition. one bin for the ready stuff, one for the getting there stuff, and one for the new stuff. having one bin makes it difficult to turn the compost, to use the compost, and for the compost itself to be composted. we started with dismantling the whole thing- moving the large brush pile in front, taking apart the cinder block wall, rolling up the sagging wire, and shoveling slimy composting food onto a tarp. surprisingly, there was quite a bit of ready to use compost. so we built a cinder block structure for the ready compost, this will be spread onto the garden in the spring and then tilled in. then came the part where we got to use power tools. i was shown for the last time (because now i remember) how to get a drill bit in and out of the drill. i am apparently a faster learner than octipi as it only took me 4 or 5 times of being taught before i remembered......we (or rather- dirty) sawed up some wood planks that have been laying around rotting to make a two bin wooden structure. there were lots of complications when it came to actually drilling the screws in. 2-squares and 4-squares (um, phillips heads and.....the other ones....) screwing and stripping and all kinds of jealousies going around. but despite all that we managed to complete it all within three days....or so. amidst all the de and re construction there was the important discovery of a mouse nest. in our last apartment there was a mouse raid once. the mice did nothing but poop everywhere, so we started calling them little fatty poop machines. it was horrible because the pest man gave us not so humane traps. i was skeptical when i first met him and noticed the he had a bleeding hole in the middle of his forehead. the mark of cain? my skepticism increased when he started describing how they test poisons out on dogs with cancer. but all the apartments got these 'humane' mice food poison boxes. so we got some too. the next thing i know, these two mice are running around frantically all over the kitchen for the next couple of days. they seemed to only like the kitchen and didn't venture out to explore the rest of the house......until it came time to leave their little furry bodies. then they came into the bedroom, got onto the quilt and proceeded to have all the blood in their bodies squished out of them. i came home from work to a sorrowful site. needless to say, everyone had their poison mouse food replaced with live traps.
but to get back onto the subect at hand.....we had disturbed a mouse nest. after we took the compost heap apart we went inside for a bite to eat. on our way back out i noticed a little tail in my shoes (that i had left outside). the mouse was really active in there and i was getting a little worried that little fatty was living out his poop machine destiny. but it turns out he was just on a quest for a new nest. after exploring the inside of my shoes, he started digging at the outside or the shoes and trying to push it over. i just wanted to mention this because it was disgustingly cute......
Subscribe to:
Posts (Atom)